Easy Gourmet Backcountry Food That Can Be Prepared in Advance
You know the aisle I'm talking about. The one between the fuel canisters and the camp chairs. You tell yourself you don't need them, that, this time, you'll walk right on by with your new dry sack and that inflatable pillow you had your eye on, and you won't give in. You know homemade backpacking meals are better, hands down. But you'll stop, just to look. We all do.
"Oh, pasta primavera, I haven't had that one yet!"
After all, you're only buying it for that first backpacking trip of the season. (It might be good! And it's only $8!) You deserve a treat after hiking 15 miles to that mountain lake. Go ahead.
But you know how the story ends. In disappointment—too much water was added, the noodles were mushy, the flavor lackluster. And when you finally remembered to check, there were only 600 calories in there anyway and you had to break into the next day's trail mix.
You came out here to hike, to lose yourself (or find yourself) in the natural world. Not to be hungry or spend precious time cooking.

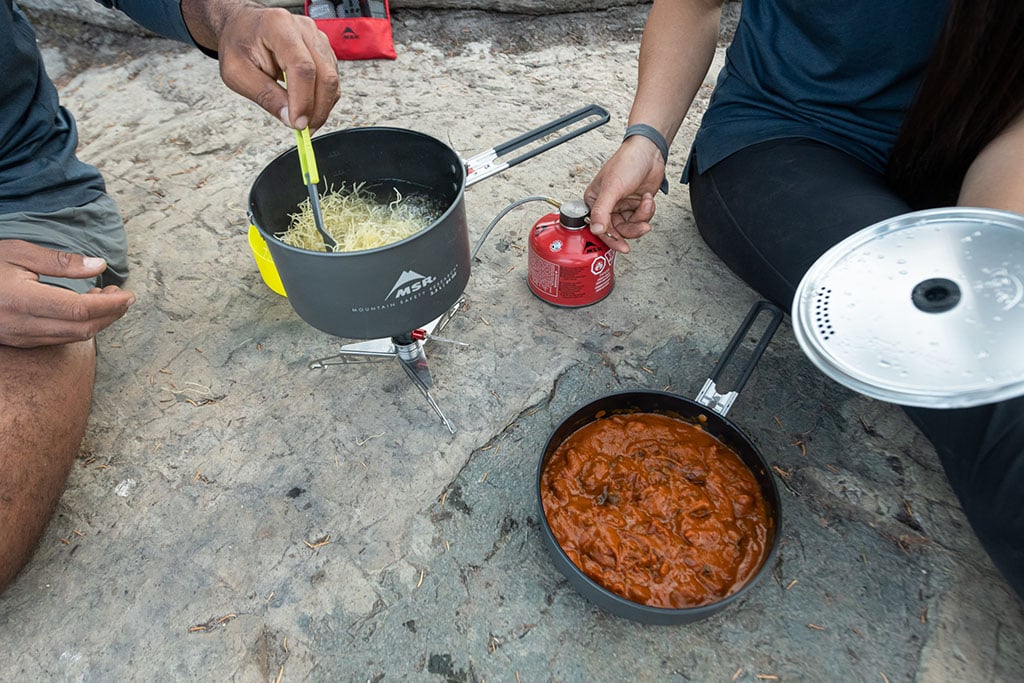
It's time to take a leap into the unknown and start making your own backpacking meals. By combining cups of boiling water with ingredients that you can buy at the local grocery store you can create a real meal in the backcountry that has as many calories as you want.
The Basics of Homemade Backpacking Meals
The Base
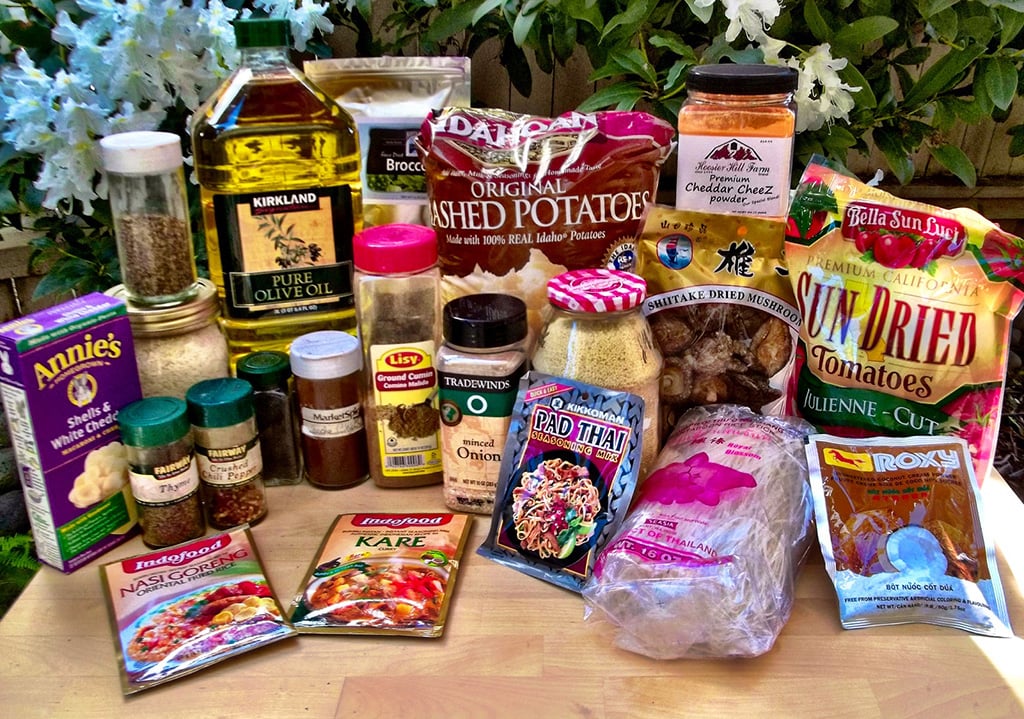
Let's start with your carbohydrates. Choose one that isn't fussy (this isn't the time for wild rice), and that packs light. Ideally, your carbohydrate will be over 100 calories per oz and rehydrate without the need to boil water for more than a minute (saving fuel). Here are a few examples:
- Couscous: One of my favorite ways to start a backpacking meal. On a hot day, couscous cooks completely by adding cold water, covering and leaving out in the sun for twenty to thirty minutes.
- Rice noodles: A great choice when you are looking for texture.
- Potato flakes: Idahoan instant potatoes are an important staple for many backcountry meals. I prefer to start with the plain flakes and add my own flavoring from there.
- Instant rice: While you can rehydrate instant rice with cold water, like couscous, I find that heating up your water to a simmer will yield better results.
- Macaroni: Pasta shapes that are small and thin (like those found in macaroni and cheese boxes) will cook completely by adding to boiling water, covering, turning off the heat, and waiting five to ten minutes.
The Flavor
Next, it's time to consider how to season your base.
- Seasoning mixes: Seasoning packets come in a wide range of flavors, including fried rice, chow mein, and chili. A great place to look for these is at an Asian grocery store, where you can also find great backcountry meal additions like powdered coconut milk and the instant chicken and beef broth used for pho—an improvement on the traditional bouillon cubes.
- Spices: Don't overlook your spice cabinet. A little dried mustard goes a long way in couscous. Dried basil can be added to pasta. Some chipotle gives a kick to the instant rice. Start experimenting and see what you like.
- Curry paste: I usually feel pretty comfortable packing curry pastes straight into my instant rice on week-long treks into the backcountry, but you'll have to gauge your own comfort level.
The Nutrition
Getting nutrition into your meal will be the hardest part. Vegetables are heavy, so (unless you have your own dehydrator) think outside of the box and look for products that have had their water weight reduced. I usually aim for 50 calories per oz, which include staples like sun-dried tomatoes and dried onions that can be found at almost any grocery store. Trader Joe's is also a great source of dried add-ins, including dried coconut, dried green beans, and dried kale. At a recent stop, I also found fried onions, which would be an amazing topping to almost any backpacking meal.

If you're willing to splurge a bit to create the perfect meal, there are online companies that sell almost any vegetable you'd want in backpacker-friendly form, from freeze-dried spinach to dehydrated sweet potatoes. Alternately, invest in a food dehydrator and start drying your own ingredients (but that's a different blog post).
The Calories
When choosing a fat for my backcountry meals, you can't go wrong calorie-wise. Most fats are upwards of 160 calories per oz, so don't hold back if you're looking for a hearty meal. I almost always default to olive oil that I carry with me in a lightweight disposable water bottle. But there are a number of others you can choose from, including peanut oil, avocado oil, safflower oil and others. Just remember that you'll want to keep your oils separate until the rest of your food has had a chance to cook. Oil and water don't mix!
This is another place where a bit of a splurge can make a big difference. Powdered butter can liven up any backcountry dish made with potato flakes while powdered parmesan or cheddar cheese can make a pasta dish worthy of the frontcountry.
The (Optional) Protein
You should have been snacking on almonds, beef jerky, and peanut butter all day, so it isn't really necessary to have protein packed into your end-of-day meal. But if you do want to incorporate it into your own backcountry recipe, there are a few options. At the grocery store you'll find both bacon bits, and, if you look carefully, dehydrated refried beans. There is also a wide range of dehydrated beans from Harmony House and freeze-dried ground beef.
There are endless ways to combine the above set of ingredients into dishes that are fast, easy and delicious. Play around at home and experiment a bit before heading out on an overnight trip with your new creations. Here's a recipe to get you started.
Homemade Backpacking Meal Recipe:
Spicy Fried Rice with Thai Basil

Ingredients:
- 1 cup instant rice
- 2 tbsp dehydrated onions
- ½ cup mixed hot veggies
- Kikkoman Fried Rice mix
- 1 pinch dried Thai basil
- 2-4 tbsp olive oil
- ¼ cup dehydrated bell peppers (optional)
- ¼ cup bacon bits (optional)
- ¼ crumbled dried mushrooms (optional)
- ¼ cup freeze-dried eggs (optional)
Directions:
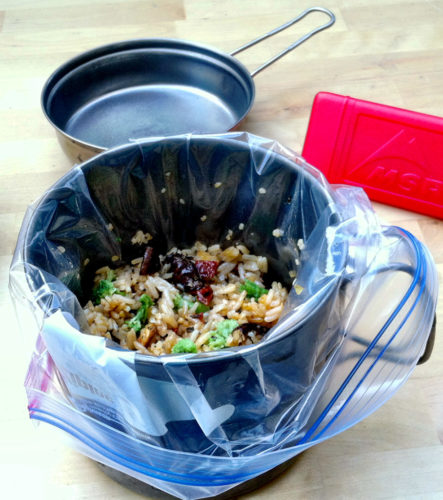
Mix all ingredients except the olive oil thoroughly. If you'll be leaving for the backcountry in the next day or so, scoop into a gallon size Ziploc freezer bag. If it will be a couple of weeks, vacuum seal for maximum freshness.
At dinnertime, boil half a liter of water and add it to your dried ingredients directly in the Ziploc freezer bag. Stir to mix, cover and wait five to six minutes. Pop the lid, mix in the olive oil and enjoy!
Related Posts:
- Backpacking Food Ideas: Ingredients to Get at the Store
- Cutting Backpacking Food Weight on a Long-Distance Hike
- Vegetarian Camping Meals Everyone Will Love
Laura Lancaster started backpacking at the age of 12 and hasn't let up since. Currentlya freelance writer and editor living in Seattle, she thru-hiked the Pacific Crest Trail in 2014 and the Wonderland Trail in 2015. Laura has been published in Backpacker, Survivor's Edge magazine, and American Survival Guide. You can see more of her work at lauralancaster.net.
Updated. Originally Published May 26th, 2015.
Source: https://www.msrgear.com/blog/homemade-backpacking-meals-just-add-water/
0 Response to "Easy Gourmet Backcountry Food That Can Be Prepared in Advance"
Post a Comment